Have you ever looked at a product and thought, “I could’ve made something better”? Maybe it’s a tool you wish worked differently, or a daily annoyance you’re convinced no one has solved yet. That tiny spark—that frustration or idea—is often how the best products are born.
Designing and manufacturing your own product might sound intimidating. Where do you even begin? Do you need a factory? A huge budget? A team of engineers? The truth is, many successful products start with a simple sketch on paper and one persistent person asking the right questions. And with the help of an on-demand manufacturer like us, you can take your idea from concept to reality with less risk and more control. Explore our One-Stop Manufacturing Service to see how we can help you through every step of the process.
In this guide, we’ll walk you through every step of the process—starting with your first idea and ending with a finished, physical product in your hands. Whether you’re a first-time creator or a curious entrepreneur, this breakdown will help you bring your vision to life—with fewer headaches and a lot more clarity.
Let’s get started.
Every great product starts with a strong idea—but the best ideas rarely appear out of thin air. They’re often the result of structured thinking, combined with a sharp awareness of real-life problems and untapped market gaps. This stage isn’t just about dreaming big—it’s about digging deep.
1.1 SCAMPER framework
SCAMPER is a proven technique to innovate by altering existing concepts. Here’s how each element can directly guide your ideation process:
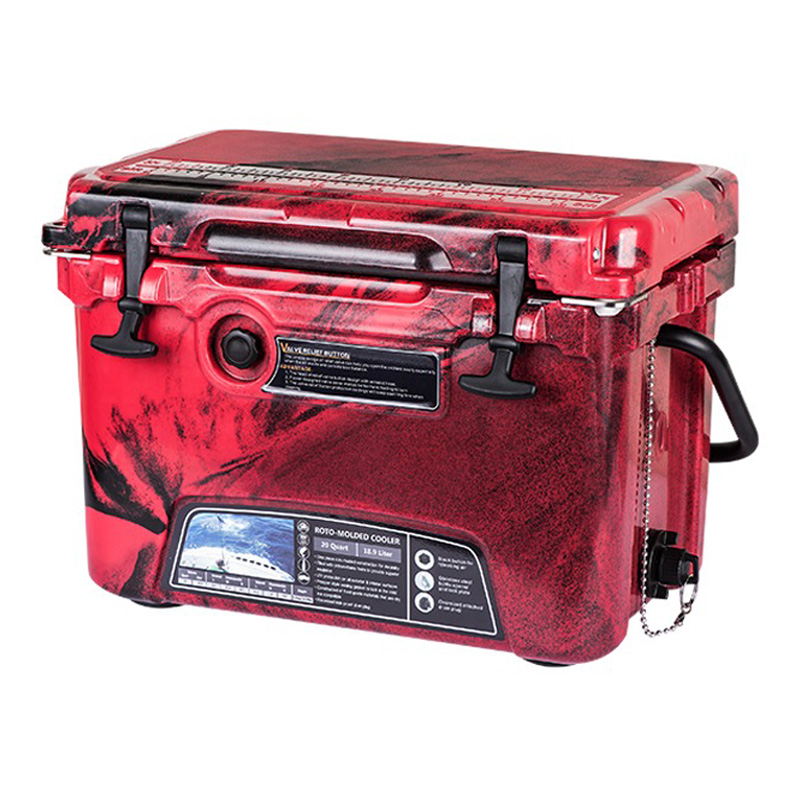
- Substitute: Look at common products in your niche. Can you replace a material, component, or even a process? For example, replacing the standard plastic exterior with a more impact-resistant material in cooler jugs could lead to a more durable and long-lasting product.
- Combine: Merge features from two or more products to enhance value. Think of how smartphones combined a phone, camera, and GPS into one essential device.
- Adapt: Take solutions from one industry and apply them to another. A fitness band sensor, for instance, can be adapted for pet health monitoring.
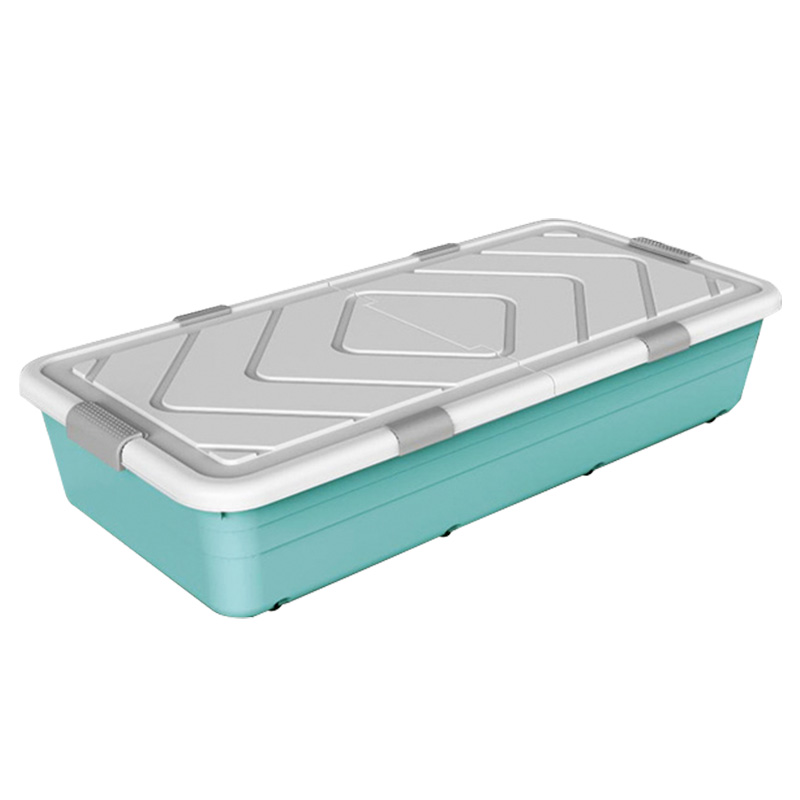
- Modify: Alter size, color, texture, or performance to suit a different demographic or use case. For example, creating stackable, space-saving storage boxes specifically designed for small apartments or dorm rooms offers a more tailored solution to urban living.
- Put to another use: Explore new users or use cases for an existing product. Noise-canceling headphones, originally for aviation, now thrive in work-from-home and travel markets.
- Eliminate: Simplify. Can you remove complexity or non-essential functions to create a leaner, more accessible product? This approach led to the success of minimalist wallets.
- Reverse: Challenge norms. Can the product’s operation, appearance, or process be flipped? For instance, bottom-dispensing shampoo bottles were born from this kind of thinking.
Each SCAMPER prompt is a lens through which you can discover variations that improve utility, reduce cost, or open up new markets.

1.2 Identify real-life problems or unmet needs around you
Great ideas often hide in plain sight. Begin by asking these practical questions:
- What tasks frustrate me daily?
- What product do I wish existed when I’m doing X?
- What do my friends or coworkers repeatedly complain about?
- What workarounds have I created for inefficient tools?
For example, the wildly successful Stardew Valley game was born when its creator, Eric Barone, noticed that fans of farm simulators were underserved. He built a game that responded directly to those unmet expectations—and cultivated a massive audience.
Pay attention to subreddits, online reviews, and community forums related to your area of interest. These spaces are rich with consumer pain points and feature requests that hint at demand before it’s formally expressed.
Remember: the goal isn’t just to invent something—it’s to solve something in a way that resonates. That’s the difference between a good idea and a product that sells.
2. Research the Market Demand
Once you have a product idea, the next step is to ensure there’s a genuine market for it. Many great ideas fall short because they target an audience that simply doesn’t exist or is too small to sustain long-term growth. Therefore, conducting thorough research is crucial for validating your concept and determining if there’s proven interest in your product.

2.1 Is there a genuine market and proven interest?
Before you proceed, ask yourself this essential question: Is there a real demand for my product? Even if your idea is innovative, it’s vital to confirm that potential customers will be willing to pay for it. Here’s how you can gauge demand:
• Market Size and Trends: Estimate the potential size of your market. Are there enough people who will need or want your product? For example, the rising popularity of outdoor lifestyles—from camping to tailgating—has driven up demand for premium ice chests with better insulation and rugged durability. If your product targets an active demographic, that’s a strong sign of opportunity.
• Pre-existing Solutions: Check if there are already similar products in the market. If so, you have competition, which can be a good sign. It means people are already interested in the category. The challenge is figuring out how you’ll stand out—maybe through longer ice retention, lighter weight, or added features like integrated cup holders.
Remember, market demand doesn’t always mean you need to reach the entire target market. Even niche products can thrive if they serve a specific, enthusiastic audience. The key is ensuring there’s a need that you can uniquely fulfill.

2.2 Helpful Tools
To back up your assumptions, leverage data-driven insights. These tools will help you measure interest and potential:
- Google Trends: Use this tool to analyze the popularity of search queries over time. If your product idea aligns with a rising trend, it indicates growing interest. You can see if search volume spikes during certain seasons or events, helping you fine-tune your launch timing. For instance, if you want to create an eco-friendly product, you can check how search interest for sustainability-related topics has changed in recent years.
- Keyword Tools: Tools like Ahrefs, SEMrush, or Ubersuggest allow you to examine search volumes and keyword difficulty. They show you how many people are searching for terms related to your product. For example, if you’re developing a new kitchen gadget, check how often phrases like “best kitchen gadgets” or “must-have kitchen tools” are searched. If these keywords have high search volume with low competition, your chances of success increase.
- Industry Reports: These reports provide in-depth insights into market trends, consumer behavior, and potential growth areas. You can find them through research organizations, consulting firms, or industry publications. Reports on consumer electronics or the beauty industry, for example, often reveal emerging trends and provide forecasts that can validate your product idea. For more targeted insights, sites like Statista or IBISWorld are excellent resources.
Combining insights from these tools will help you build a comprehensive understanding of whether your product is meeting a real market need. Always cross-check data points to ensure your product idea aligns with consumer demand and emerging market trends. If the data shows high interest and you can find an edge over competitors, you’re well on your way to success.
3. Analyze Your Competitors
Understanding your competition is one of the most crucial steps in developing a successful product. Knowing who you’re up against will help you pinpoint your product’s unique selling points (USPs), find opportunities for improvement, and avoid potential pitfalls. This step is all about assessing the competitive landscape and identifying how you can carve out your niche.

3.1 What similar products exist?
Begin by identifying products already available in the market that are similar to yours. This doesn’t just mean direct competitors but also indirect ones — those that solve the same problem in a different way. Consider the following:
- Direct Competitors: These are products that serve the same function as yours. For example, if you’re creating a new fitness tracker, your direct competitors would be companies like Fitbit, Apple, or Garmin. These brands are already established in the market and have customer loyalty, so it’s crucial to understand what they do well and where they fall short.
- Indirect Competitors: These products may not solve the exact problem your product addresses but provide alternative solutions. For instance, if you’re creating a new productivity tool, your indirect competitors could be existing productivity apps, physical planners, or even time-management books.
Once you identify the key players, look closely at their product offerings. What features do they provide? How do they price their products? What makes their products appealing to consumers? By understanding their approach, you’ll be better positioned to either challenge or complement what they offer.
3.2 Can you differentiate on features, pricing, or audience?
Once you’ve mapped out the competitive landscape, it’s time to figure out how to set your product apart. Competition analysis isn’t just about what other brands are doing right but also about identifying gaps and opportunities. Here’s how to analyze your differentiators:
- Features: What can you offer that your competitors don’t? If you’re launching a new pair of wireless headphones, can you offer a unique sound profile, longer battery life, or additional features like noise-canceling that your competitors lack? Focus on innovative features that will resonate with your target audience and solve problems in a more effective way.
- Pricing: Is your product positioned as a premium offering, or do you want to compete on affordability? Your pricing strategy can significantly impact how your product is perceived in the market. A premium price can signify higher quality or exclusive features, while a budget-friendly price might attract more price-sensitive customers. Carefully consider your target market’s expectations and willingness to pay.
- Target Audience: Sometimes, the difference between your product and the competition lies in your specific target audience. If your competitors cater to young professionals, perhaps your product can focus on a different demographic, such as athletes, parents, or senior citizens. Understand your audience’s pain points and create messaging that resonates with them.
Through competitor analysis, you’ll be able to develop a clearer picture of how to position your product in the market and what makes it unique. Whether you decide to differentiate through advanced features, better pricing, or targeting a new audience, you’ll need to clearly communicate these distinctions to your potential customers. Understanding your competition allows you to be more strategic in your product development and marketing, ensuring your product stands out in a crowded market.
4. Connect with Your Target Customers
The key to creating a product that truly resonates with your audience is understanding their needs, desires, and pain points. Engaging directly with potential customers early in the process allows you to refine your idea, improve the product, and ensure that your final design aligns with what people want. Here are a few ways to connect with your target customers and get valuable feedback:

4.1 Explore forums like Reddit, niche communities
Online forums and niche communities can be goldmines of information. These spaces are where your potential customers are likely already discussing the problems your product aims to solve. Platforms like Reddit offer a variety of subreddits related to specific topics or industries. Search for relevant subreddits or online communities where your target audience hangs out and start participating in the discussions.
- Example: If you’re creating a new skincare product, you can explore subreddits like r/SkincareAddiction or r/Beauty. Pay attention to the discussions, common concerns, and product recommendations. Take note of what people like, dislike, and what they wish could be improved.
- Tip: Don’t just lurk — engage with users, ask questions, and offer value. This interaction will help you gain insight into customer expectations and start building a rapport with your potential market.
4.2 Use waitlists or surveys
A great way to gauge interest before your product is even ready is by creating a waitlist or conducting surveys. A waitlist lets potential customers sign up for updates, and you can incentivize early adopters by offering them exclusive discounts or early access. This not only builds excitement around your product but also serves as a tool to validate demand.
- Surveys: Create simple, straightforward surveys using platforms like Google Forms or Typeform. These surveys can ask specific questions about customer preferences, problems they face, and their willingness to pay for a solution. Include questions like:
- “What features would make you more likely to purchase this product?”
- “How much would you be willing to pay for a solution to this problem?”
- “Would you be interested in receiving updates about this product?”
- Tip: Keep the survey short and easy to complete to increase the chances of participation. Offer something in return for their time, like a chance to win a prize, to encourage people to fill it out.
4.3 Consider crowdfunding platforms to gauge interest
Crowdfunding platforms like Kickstarter or Indiegogo are powerful tools for validating product ideas and securing early funding. When you launch a campaign, you’re not only raising money but also testing the market’s willingness to support your product. Successful campaigns validate that there is genuine demand, and backers’ feedback can help you further refine your product before full-scale manufacturing.
- Benefits of crowdfunding:
- Market Validation: Backers are essentially pre-buying your product, demonstrating there’s proven interest.
- Early Feedback: Crowdfunding allows you to engage with your backers and get valuable insights on product design, pricing, and features.
- Building Buzz: A successful campaign can help you build momentum and excitement around your product long before it hits the market.
- Tip: Make sure your campaign is well thought out, with clear messaging, visuals, and a compelling reason for people to back your product. A strong pitch video can significantly improve your chances of success.
By connecting with your target customers through these platforms, you not only gather invaluable insights but also create a community of engaged potential buyers. Listening to your audience and integrating their feedback into your product development will improve your chances of creating a product people actually want to buy.

5. Sketch and Plan Your Product Design
Once you’ve validated your idea and gathered feedback from potential customers, it’s time to translate your concept into a tangible design. Product design is a crucial step that combines creativity, functionality, and practicality to create a product that not only solves a problem but also stands out in the market. Here’s how you can go about sketching and planning your product design:
5.1 Create functional sketches and diagrams
Start with simple sketches to visually represent your product idea. This doesn’t need to be perfect — the goal here is to capture your vision and communicate it clearly. Create both:
- Functional sketches: These are rough representations that highlight how the product will function in the real world. Think about how the user will interact with it and how the components will fit together. For example, if you’re designing a new kitchen tool, show how the handle connects to the blade, how it can be used, and where the user’s hand will grip.
- Diagrams: More technical than sketches, these diagrams should represent the inner workings of the product. Include dimensions, labels, and specific features like holes, buttons, or connectors that are part of the design. These diagrams are important for both the prototyping phase and manufacturing process.
- Tip: If you’re not confident in your drawing skills, start with digital design tools like SketchUp or Tinkercad, which can help you build more detailed 3D models without needing advanced skills.

5.2 Define key features, aesthetics, and materials
Once you have the basic structure and functionality mapped out, start thinking about the details:
- Key features: What makes your product unique? Is there a particular function or design element that will set it apart from the competition? For instance, a custom ergonomic handle on a tool or a feature that simplifies the user experience can be a key selling point.
- Aesthetics: How should your product look? Consider color, shape, texture, and style. What will make it visually appealing and recognizable? Aesthetics are often tied to brand identity, so think about how your product fits within the overall image of your brand.
- Materials: Choose materials that are functional, cost-effective, and durable for your product. Consider the purpose and environment in which the product will be used. For example, a kitchen tool may require high-quality stainless steel, while a soft toy might use hypoallergenic fabrics.
5.3 Hire help if needed
If your sketching or design skills are limited, or if you want a more professional touch, don’t hesitate to hire experts. Platforms like Fiverr, Upwork, and Dribbble are great places to find freelance product designers, illustrators, and 3D modelers. You can hire someone who specializes in creating product sketches, technical drawings, and 3D models to bring your ideas to life.
- Fiverr: Offers a wide range of designers who can help with both concept sketches and detailed technical designs.
- Upwork: Provides more specialized talent, from industrial designers to product engineers, who can guide you through every aspect of product design.
- Dribbble: Ideal for finding designers with an eye for aesthetics and branding, helping you to craft a product that’s both functional and beautiful.
- Tip: When working with a freelancer, be clear about your expectations and share any sketches, ideas, and notes you have. This will help them better understand your vision and deliver a design that matches your goals.
By the end of this phase, you should have a clearer picture of how your product will function, look, and feel, and a plan for its construction. Whether you do the design work yourself or enlist help, this step ensures that your product will be both practical and appealing to your target market.
6. Build and Test a Prototype
Creating a prototype is an essential step in transforming your idea into a physical product. It allows you to test the functionality and design, identify potential issues, and make improvements before moving into full-scale production. Here’s how to build and test your product prototype effectively:

6.1 Start with a basic version
The first prototype doesn’t need to be perfect; it just needs to bring your idea into a tangible form. Depending on your product, you can either:
- DIY: If you have the skills and tools, you can create a basic prototype yourself. Materials like cardboard, foam, or 3D printing can be useful for creating simple versions of your product.
- Freelance help: If you’re not confident in your DIY abilities, consider hiring a freelancer. Platforms like Upwork and Fiverr have skilled professionals who can help you build an early prototype, either using traditional methods or digital fabrication techniques like 3D printing.
Don’t worry about perfect aesthetics at this stage. The goal is to test functionality and get a sense of how your product will perform in real-world scenarios.
6.2 Collect feedback from early users
Once you’ve built a basic prototype, it’s time to gather feedback. Find a small group of potential customers or trusted individuals who can assess the product and provide honest, constructive criticism. Early user feedback is invaluable, as it will help you identify issues you might not have thought of. Here’s how to make the most of this step:
- Target your feedback group: Choose users who represent your ideal customer base. Their feedback will be more relevant to the final product. If your product is for gamers, for example, get opinions from people who regularly play video games.
- Ask the right questions: Don’t just ask “Do you like it?” Instead, ask specific questions like: “How easy was it to use?” “Were there any features that were confusing?” or “What would you change?”
- Iterate quickly: Don’t wait too long to gather feedback. As soon as possible, let your prototype interact with real users to spot any design flaws or functionality issues early on.
6.3 Iterate through multiple testing-modification loops
The first prototype is unlikely to be perfect, so it’s essential to go through several rounds of testing and modifications. This process allows you to refine your product and ensure it meets both design goals and user expectations. Here’s what to do during the iteration phase:
- Analyze feedback thoroughly: Go through all feedback collected from your test users. Look for patterns and common complaints or suggestions.
- Make necessary changes: Based on the feedback, adjust your prototype. This could involve tweaking the design, altering the materials, or modifying the functionality.
- Test again: After modifications are made, test the updated prototype with a fresh group of users. This is an ongoing process that ensures the product improves with every cycle. Don’t rush through this — the more thorough you are, the better your final product will be.
- Tip: Keep a detailed record of each round of testing, feedback, and changes made. This helps you track progress and ensures that you don’t repeat mistakes or miss essential improvements.
Each iteration brings your product closer to its final version, with the ultimate goal of creating something that works seamlessly and truly satisfies your customers’ needs. Once you’ve tested, refined, and validated your prototype, you’re ready to move forward confidently.
And when that moment comes, partnering with a reliable one-stop manufacturer like KingStar Mold can simplify the next phase—handling everything from tooling to production under one roof, so you can scale faster and smarter.
7. Identifying the Right Manufacturing Partners
Once your prototype is ready, choosing the right manufacturing partner becomes a defining step in your product’s journey. It’s not just about who can make your product—it’s about who can make it right. A reliable OEM manufacturer like KingStar Mold can offer more than just production: we provide end-to-end support, consistent quality, and the flexibility to scale with your vision. Here’s how to find and evaluate manufacturers that truly align with your goals:
7.1 Explore Sourcing Platforms and Trade Shows
Begin your search for manufacturers using online platforms and industry events that connect you with suppliers from around the world:
- Alibaba: A widely used platform that links you with manufacturers, especially in Asia. It’s ideal for comparing pricing, reading reviews, and requesting quotes from multiple suppliers.
- Thomasnet: This platform is great for finding U.S.-based manufacturers. It offers detailed information about suppliers, including their certifications and industry experience.
- Trade Shows: Attending trade shows provides the opportunity to meet manufacturers face-to-face, inspect product samples, and discuss your specific needs in person. Trade shows also allow for networking with other entrepreneurs and industry professionals.
- Industry Groups and Recommendations: Apart from online sources, leverage connections in industry-specific forums and business networks for additional leads.

7.2 Assess Manufacturer Capabilities and Costs
Evaluating potential suppliers goes beyond cost. Consider these factors to find the right fit:
- Cost Efficiency: While it’s tempting to go with the cheapest option, make sure you factor in quality, shipping, and potential hidden costs. A more expensive manufacturer may offer a better overall deal if their products are of higher quality and produced faster.
- Quality Control Standards: Request samples from potential manufacturers and assess their quality. Ask about their quality control procedures, certifications, and past client experiences. This ensures the product meets your standards before moving into mass production.
- Lead Times and Delivery: Understand each manufacturer’s production timeline. If your product has a tight launch schedule, speed is critical. However, always balance speed with quality to avoid rushing through quality control.
7.3 Diversify Your Supplier Network
Relying on a single supplier can be risky, so it’s essential to build relationships with multiple manufacturers:
- Backup Suppliers: Having more than one supplier ensures you have alternatives if one experiences delays or quality issues. This can help prevent disruptions in your production schedule.
- Negotiation Leverage: Multiple suppliers give you more room to negotiate better pricing, faster lead times, and favorable contract terms. You can use the competition to secure the best deal.
- Long-Term Relationships: Over time, you’ll build trust with your manufacturers. Developing a strong partnership can lead to preferential treatment, better deals, and smoother communication for future projects.
Finding the right manufacturers is a vital step in turning your idea into a market-ready product. By carefully evaluating suppliers and establishing multiple relationships, you set yourself up for success in production and delivery.
8. Order Samples and Finalize Specifications
Before moving into full-scale production, it’s essential to validate that your product meets your expectations. Ordering samples allows you to test and refine key aspects of your design and ensures that your product is ready for mass manufacturing. This step involves meticulous attention to detail, so you can prevent costly mistakes down the line.
8.1 Request Pre-Production Samples for Review
Once you’ve selected a manufacturer, it’s time to request pre-production samples. These samples are prototype versions produced using the actual materials and manufacturing processes that will be used in mass production.
- Test Functionality: Evaluate whether the sample performs as expected, checking for issues like usability, durability, and design integrity.
- Check Design Fidelity: Ensure that the sample closely matches your design specifications, including dimensions, weight, and overall appearance.
- Feedback from Stakeholders: Share the sample with your team, early testers, or potential customers to gather their opinions. Incorporating their feedback can help refine the final product.
8.2 Refine Tolerances, Materials, and Finish
During the sample review process, you may find areas for improvement. This is the time to tweak details such as tolerances, materials, or the finish of the product.
- Tolerances: Verify that the product’s dimensions meet the required precision. In some cases, minor adjustments in manufacturing can result in better fits or smoother functions.
- Materials: If the material doesn’t meet your expectations (whether in terms of texture, strength, or color), communicate this to the manufacturer. Material choices affect everything from product durability to cost, so getting this right is crucial.
- Finish: Inspect the finish of the product—whether it’s matte, glossy, smooth, or textured. The right finish is essential not just for aesthetics but also for functionality and customer satisfaction.
8.3 Approve the Golden Sample Before Scaling
Once you’ve refined all the details based on feedback, it’s time to approve the “golden sample.” This is the final version of your product that you will sign off on as the template for mass production.
- Final Approval: Carefully review every aspect of the golden sample. Ensure that it matches your vision and all technical requirements.
- Testing Under Real Conditions: Conduct tests in real-world conditions, such as durability tests or functionality assessments, to make sure the product performs well under typical use.
- Documentation: Once approved, ensure that the specifications are well-documented and agreed upon with your manufacturer, including materials, tolerances, and any specific production processes that need to be followed.
Approving the right sample before moving to full production is a critical step that can save you time, money, and potential headaches. By thoroughly reviewing and refining your product at this stage, you set the foundation for a successful mass production process.
9. Conduct Quality Testing and Control
Quality testing and control are crucial to ensuring that the final product meets the standards expected by both you and your customers. Effective quality control helps you avoid costly defects, returns, or dissatisfied customers. This stage involves thorough testing and monitoring throughout production to ensure consistency and performance.

9.1 Simulate Real-World Usage
To guarantee your product’s success in the market, it needs to withstand real-world conditions.
- Stress Testing: Put your product through various simulated use scenarios to assess its durability. For example, if you’re making a tool, subject it to heavy use or extreme conditions. If it’s a wearable product, test for wear and tear over time.
- Functionality Assessment: Test the product’s key features to ensure that it functions properly in everyday use. Consider all possible customer interactions and ensure that your product performs as expected under typical conditions.
- Longevity Testing: Evaluate how the product holds up over time. This might include accelerated aging tests or long-term wear simulations.
9.2 Inspect Batch Samples During Production
Even after your product has been perfected, quality checks must be conducted continuously during manufacturing.
- In-Process Inspection: Regularly inspect batch samples throughout the production process. This helps identify defects early, preventing the production of large batches of faulty products.
- Random Sampling: Conduct random inspections of different batches to maintain consistent quality. This allows you to catch variations in manufacturing quality that could impact the final product.
- Spot Checks on Materials: Test raw materials and components before they are used in production to verify that they meet the required specifications and standards.
9.3 Document Quality Check Processes and Standards
It’s essential to have a clear, documented process for quality control to ensure consistent results.
- Develop a Quality Control Checklist: Create a detailed checklist of all aspects to be inspected, such as materials, dimensions, and functionality. This should be part of the production documentation and referred to during each production cycle.
- Track Issues and Adjustments: Document any issues identified during testing, including the specific batches affected, corrective actions taken, and any changes made to the process. This helps maintain consistency and facilitates troubleshooting in future production runs.
- Standard Operating Procedures (SOPs): Establish clear SOPs for quality control to ensure every batch is checked according to the same criteria. This includes specific procedures for inspectors to follow, tools to be used, and reporting protocols.
Effective quality testing and control are about more than just identifying flaws—it’s about ensuring that every product produced lives up to the promise of your brand. By investing time and effort into this process, you can ensure that your product will delight customers and stand the test of time.
10. Calculate Your Full Cost of Goods Sold (COGS)
Accurately calculating your Cost of Goods Sold (COGS) is essential for setting the right pricing strategy and ensuring your product is profitable. COGS includes all direct expenses involved in producing and delivering your product to the customer. Understanding these costs will help you make informed decisions about pricing, margins, and overall business sustainability.
To get an accurate picture of your total production cost, consider the following essential components:
- Labor and Materials
This includes the direct cost of the raw materials used to create your product, as well as the labor costs for manufacturing.- Materials: Include every part or component needed to make the product, whether it’s the raw materials or specialized components that are sourced from suppliers.
- Labor: Factor in the wages paid to factory workers, designers, or any skilled labor directly involved in the creation of your product.
- Shipping and Customs
The cost of transporting goods from your manufacturer to your warehouse or directly to your customers must be accounted for.- Shipping Fees: This includes both domestic and international shipping fees. The method of transportation (air, sea, or land) will significantly affect the cost.
- Customs Duties and Taxes: When importing goods, customs fees and taxes must be considered. These can vary greatly depending on the country of origin and destination. Be sure to research import tariffs to avoid surprises.
- Packaging
Packaging not only protects your product during transit but also contributes to your branding and customer experience.- Materials: The cost of boxes, wrapping materials, labels, and custom packaging should be factored into the total cost.
- Design and Branding: If your product includes special packaging design or branded boxes, include the cost of professional services in this category.
- Payment Processing Fees
Every transaction made online comes with a fee. These fees typically include a percentage of the sale price along with a fixed transaction fee.- Credit Card and Online Payment Processing: Whether you’re using platforms like PayPal, Stripe, or a traditional credit card gateway, these fees can quickly add up, so it’s important to track them as part of your COGS.
By understanding each of these cost components, you can pinpoint where your expenses are highest and where you may have room to optimize. This knowledge isn’t just about crunching numbers—it’s about strategically pricing your product for maximum profitability while staying competitive in the market. With your COGS calculated, you’ll be ready to make smarter, more confident decisions that pave the way for your product’s success in the marketplace.

Conclusion
Designing and manufacturing a product from scratch is no small feat. It requires careful planning, constant iteration, and the ability to identify the right partners to support your vision. Each step—from idea generation to quality control—plays a crucial role in turning your concept into a market-ready product.
At KingStar Mold, we understand the importance of preparation and precision in every phase of the process. Our team is here to provide you with expert guidance and support, ensuring that your product is crafted to the highest standards. Remember, the more you prepare and refine, the smoother your journey will be. Don’t be afraid to take action, even if it feels daunting. Start small, learn as you go, and leverage resources and expertise that can guide you along the way. With the right approach and determination, your product will not only be created but will thrive in the marketplace.